Provisioning Virtual Servers in the Cloud (AWS EC2)
Launch and configure an Amazon EC2 Linux instance and establish a remote terminal connection using an SSH Key Pair.
| Option | Value |
|---|---|
| Prerequisites | AWS Free Tier Account |
| Estimated Time | 30 minutes |
| Technology | AWS EC2 (Elastic Compute Cloud), SSH, Security Groups, Key Pairs |
🎯 Aim
To create, configure, and launch an Amazon EC2 (Elastic Compute Cloud) Linux instance in the AWS Cloud, and establish a remote terminal connection using an SSH Key Pair.
📖 Theoretical Background
Amazon EC2 (Elastic Compute Cloud)
Amazon EC2 is a web service that provides secure, resizable compute capacity in the cloud. It is classified as an Infrastructure as a Service (IaaS) offering because it allows users to lease virtual servers (instances) on-demand, giving complete control over the operating system, storage, and networking.
Key Concepts:
- AMI (Amazon Machine Image): A pre-configured template containing the OS, application server, and applications needed to launch your instance.
- Instance Type: Defines the CPU, memory, storage, and networking capacity of the host computer. For free tier eligibility, we use the
t2.microort3.microinstance type. - Security Group: A virtual firewall that controls incoming and outgoing traffic for your instance.
- Key Pair (SSH Key): A cryptographic key pair used for authentication. The public key is stored on the EC2 instance, and the private key (
.pemfile) is kept by the user to securely log in via SSH.
🛠️ Requirements & Setup
- An active AWS account. If you do not have one, refer to the AWS Account Setup Guide.
- A terminal client:
- Linux/macOS: Native Terminal.
- Windows: PowerShell, Command Prompt, or Git Bash.
🚶 Step-by-Step Procedure
Phase A: Launching the EC2 Instance
-
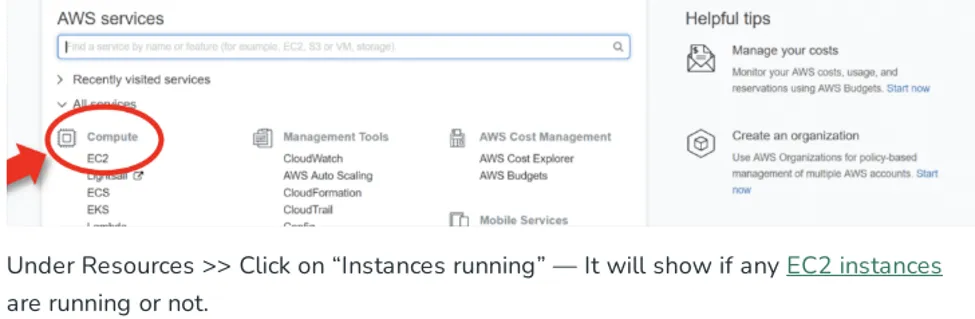
Log in and navigate: Go to the AWS Management Console and sign in. Under the Services menu on the top-left, select EC2 under the Compute category.
-
Start Wizard & Name the Instance: Click on the Launch Instance button. In the Name and tags section, specify a name for your server (e.g.,
Lab-Web-Server).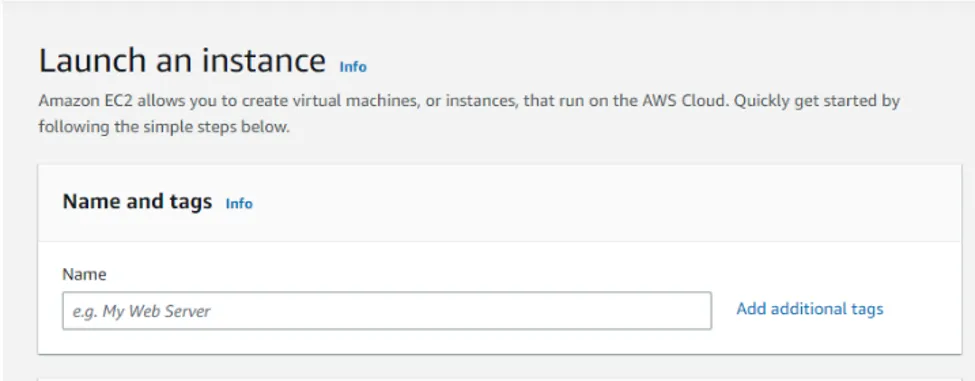
-
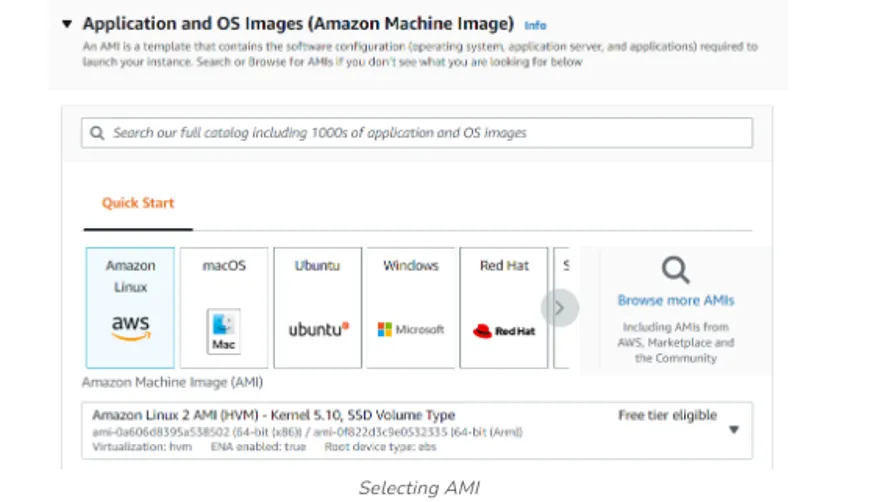
Choose Operating System (AMI): In the Application and OS Images (Amazon Machine Image) section, select Ubuntu (or Amazon Linux). Ensure the selected AMI has the label “Free tier eligible”.
-
Select Instance Type: Under Instance type, select
t2.micro. Ensure it displays the “Free tier eligible” tag to avoid any unexpected charges.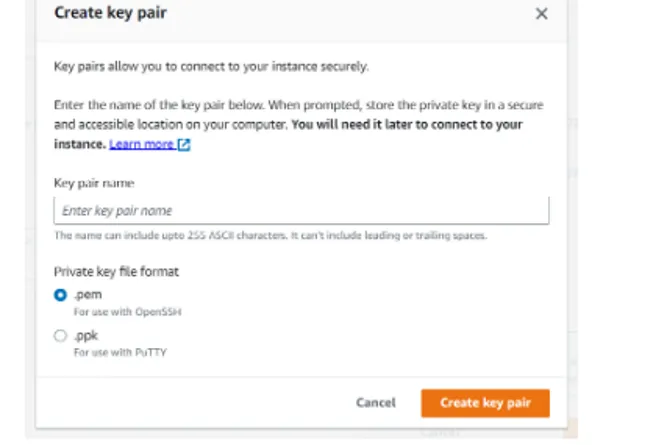
-
Configure Storage & Key Pair:
- Under Key pair (login), click Create new key pair to generate a
.pemfile. - Keep default network settings.
- Under storage configuration, verify that it selects free tier storage (Up to 30 GB EBS is eligible).
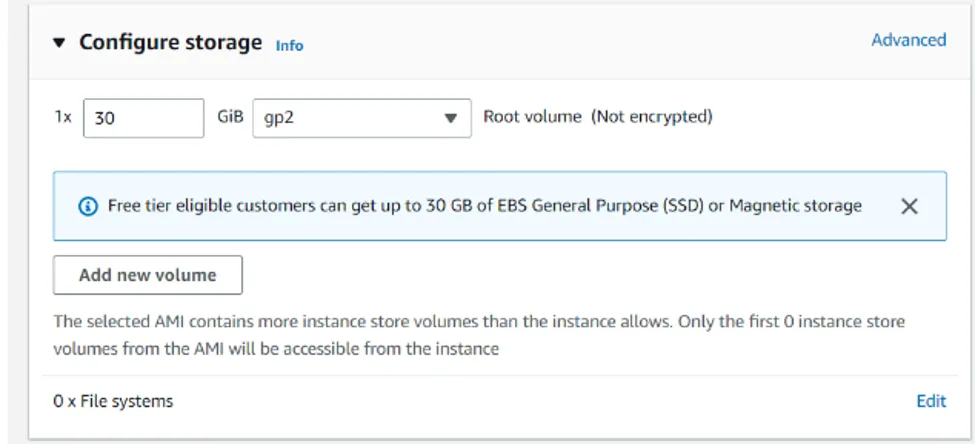
[!IMPORTANT] Save the downloaded
.pemkey-pair file in a secure directory. You will need it to connect to the server. - Under Key pair (login), click Create new key pair to generate a
-
Launch Instance: Review the configurations on the right pane and click Launch instance.
Phase B: Connecting to the EC2 Instance using SSH
-
Locate Connection Details:
- Select your running instance in the EC2 Console.
- Click the Connect button at the top menu.

-
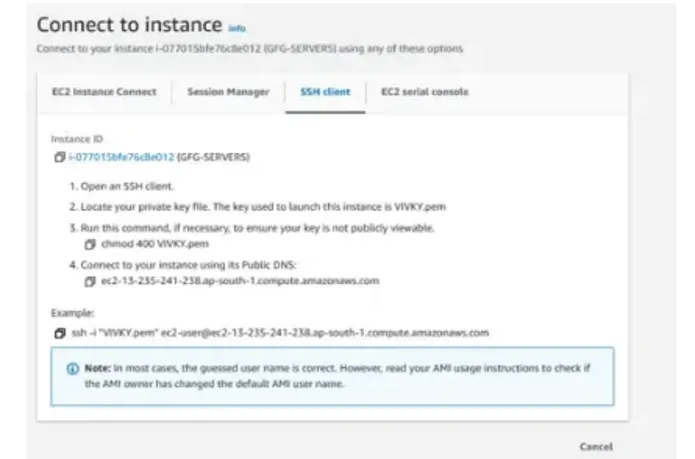
Retrieve SSH Command:
- Navigate to the SSH client tab.
- Copy the example connection command shown at the bottom.
-
Establish SSH Connection:
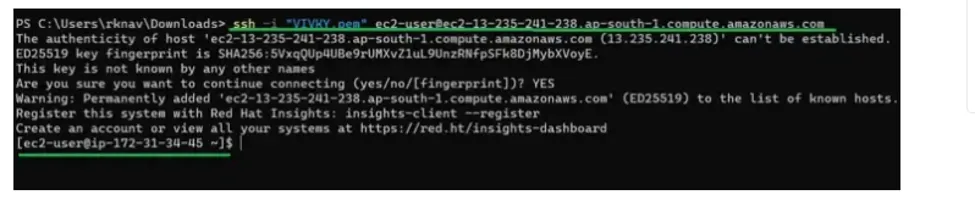
- Open your terminal (e.g., Command Prompt, Powershell, or Git Bash).
- Navigate to the directory where your
.pemfile is located (e.g.,cd Downloads). - Run the copied SSH command to connect to your EC2 instance.
🧪 Expected Output & Verification
- Once successfully authenticated, the terminal prompt will change to show the virtual machine’s command prompt:
ubuntu@ip-172-31-xx-xx:~$ - Run the system updates command to verify internet connectivity:
sudo apt-get update
[SECTION: ORAL EXAMINATION LOG]
Viva Voce Study Guide
The following index represents standard conceptual questions asked during the practical assessment. Review the expected model answers below.