Virtualization - Hypervisor & Guest OS Setup
Download, install, and configure a Type-2 hypervisor (Oracle VM VirtualBox) and install a guest Linux Operating System (Ubuntu).
| Option | Value |
|---|---|
| Prerequisites | A 64-bit host computer, VirtualBox installer, Ubuntu Desktop ISO image |
| Estimated Time | 45 minutes |
| Technology | Oracle VM VirtualBox, Linux (Ubuntu Desktop/Server) |
🎯 Aim
To download, install, and configure a Type-2 hypervisor (Oracle VM VirtualBox) and install a guest Linux Operating System (Ubuntu) on top of a Windows host machine.
📖 Theoretical Background
Virtualization
Virtualization is the process of creating a software-based (virtual) representation of something physical, such as virtual applications, servers, storage, and networks. It is the core technology powering cloud computing.
Hypervisor
A hypervisor (or Virtual Machine Monitor, VMM) is software that creates and runs virtual machines (VMs).
- Type-1 (Bare-Metal): Runs directly on the host’s hardware (e.g., VMware ESXi, Microsoft Hyper-V).
- Type-2 (Hosted): Runs as an application on top of an existing Operating System (e.g., VirtualBox, VMware Workstation). This lab uses VirtualBox, a Type-2 hypervisor.
graph TD
    subgraph Type-2 Hypervisor Architecture
        A[Hardware] --> B[Host OS: e.g., Windows]
        B --> C[Hypervisor: VirtualBox]
        C --> D[Guest VM 1: Ubuntu Linux]
        C --> E[Guest VM 2: Windows OS]
    end
🛠️ Requirements & Setup
- VirtualBox Installer: Download from the official VirtualBox Downloads Page (Select Windows hosts).
- Guest OS ISO: Download the Ubuntu Desktop LTS ISO.
🚶 Step-by-Step Procedure
Phase A: Installing Oracle VM VirtualBox
-
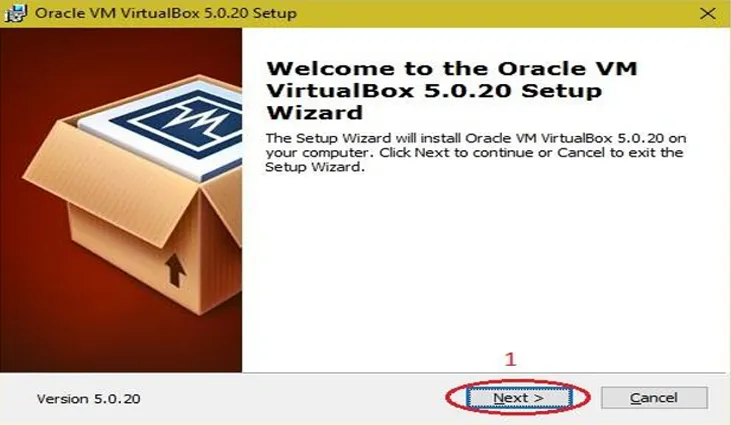
Double-click the downloaded VirtualBox installer executable. On the Welcome to the Oracle VM VirtualBox Setup Wizard screen, click Next.
-
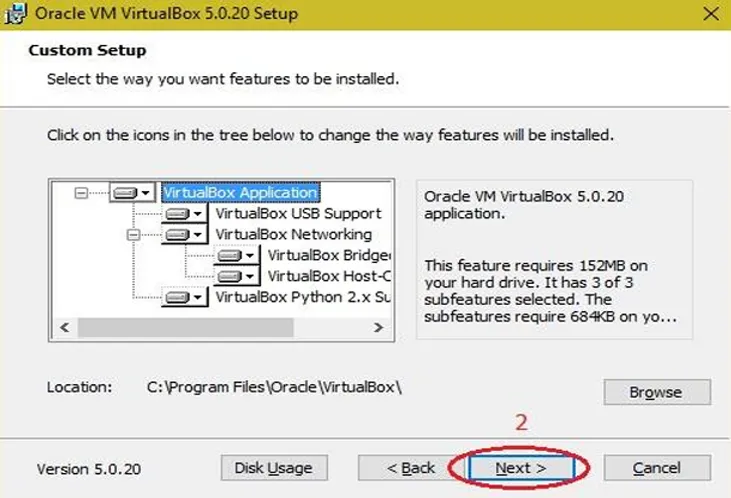
Keep the default installation features and path unchanged, then click Next.
-
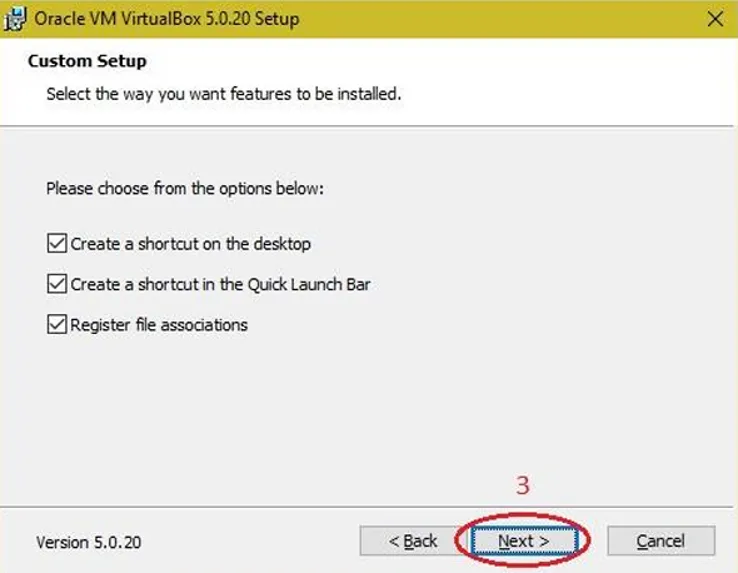
Review the shortcut preferences and settings, and click Next.
-
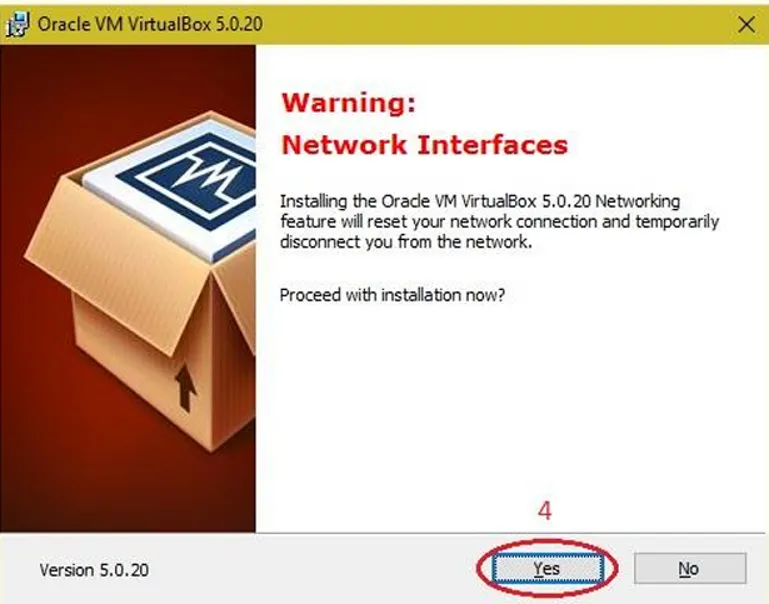
A warning about Network Interfaces will appear (temporary disconnect during virtual interface setup). Click Yes to proceed.
-
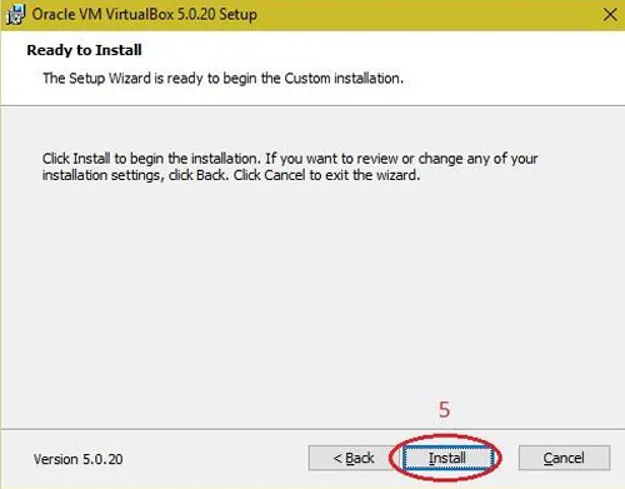
Click Install to begin the installation process.
-
Once the installation is complete, click Finish. The VirtualBox shortcut icon will now appear on your desktop.
Phase B: Creating a New Virtual Machine
- Open VirtualBox and click the New button (Blue Ribbon icon) at the top.
- In the Create Virtual Machine dialog, configure the following details:
- Name:
Ubuntu-Lab - Folder: Select the location to store VM files (default is usually fine).
- ISO Image: Browse and select the downloaded Ubuntu ISO file.
- Type:
Linux - Version:
Ubuntu (64-bit) - Optional: You can check Skip unattended installation if you want to manually run through the OS setup screens. Click Next.
- Name:
- Hardware Configuration:
- Base Memory (RAM): Allocate at least
2048 MB(2 GB) or4099 MB(4 GB) if your host system allows. - Processors: Assign at least
2 CPUs. Click Next.
- Base Memory (RAM): Allocate at least
- Virtual Hard disk:
- Select Create a Virtual Hard Disk Now.
- Allocate at least
25 GBof disk size (dynamically allocated is default and recommended). Click Next.
- Review the summary and click Finish.
Phase C: Installing the Guest OS (Ubuntu)
- Select your new VM from the left panel and click Start (Green arrow).
- The VM will boot from the ISO. In the GRUB menu, select Try or Install Ubuntu and hit Enter.
- Once the installer loads, select your preferred language and click Install Ubuntu.
- Choose keyboard layout (Default: English US) and click Continue.
- Select Normal Installation and check Download updates while installing Ubuntu. Click Continue.
- Select Erase disk and install Ubuntu (This only erases the virtual hard disk created in Phase B, not your Windows drive). Click Install Now and confirm the write changes dialog.
- Choose your timezone and click Continue.
- Set up your user credentials:
- Your Name:
Lab Student - Computer Name:
ubuntu-vm - Username:
student - Password: Set a secure password.
- Your Name:
- Click Continue and wait for the installation to complete.
- Once prompted, click Restart Now and press Enter when asked to remove the installation medium.
🧪 Expected Output & Verification
- Upon restart, the Ubuntu login screen will load.
- Log in with the password you configured.
- Open a web browser or terminal (
Ctrl+Alt+T) inside the virtual machine to verify internet connectivity.
[SECTION: ORAL EXAMINATION LOG]
Viva Voce Study Guide
The following index represents standard conceptual questions asked during the practical assessment. Review the expected model answers below.